Showing posts with label baking. Show all posts

Sunday, October 6, 2013

Delicious Almond Chocolate Chip Cookies

A friend of mine brought me a plate of these delicious cookies with the recipe as a thank you last year for letting her borrow something. Turns out these are a perfect cookie for people who don't often cook gluten-free to make because they don't require xanthan gum. Who wants to spend $10 for xanthan gum you will rarely use and only need a teaspoon of to cook some cookies? 

They're also perfect for those who cook gluten-free a lot because they taste so good and are easy.

Almond Chocolate Chip Cookies
1 C. almond flour/meal
1/4 t. baking soda
1/8 t. salt
2 T. canola oil
2 T. agave nectar
1/2 t. vanilla extract
1/4 C. semi-sweet mini chocolate chips

Directions:
1. Preheat oven to 350 degrees. Line 2 baking sheets with parchment paper or silpat mats.
2. In a medium bowl, whisk together almond flour, baking soda and salt. In a small bowl, whisk together oil, agave and vanilla. Pour wet mixture into dry and stir until blended. Stir in chocolate chips.
3. Drop dough by level teaspoonfuls (literally-a measured teaspoon!) onto baking sheet, 2 inches apart. Bake 7-8 minutes. Let cool 5 minutes before removing to a rack to cool completely.

Beware, they're bite size and delicious, so before you know it the whole batch will be gone. You might want to double the recipe if you want it to last more than 10 minutes.
Posted by Picasa

Sunday, September 1, 2013

Super easy Chewy-style Granola Bars


I have been on a quest to find the perfect homemade granola bars. My kids and I really like the Chewy granola bars, but, of course they are not gluten-free. I liked this one pretty well, but then I found this no-bake recipe that is super fast and easy and tastes just like the Chewy granola bars we used to buy.

The original was shared by a friend on facebook and credit was given to Carole Jones of My Kitchen Escapades. I've changed it just a little, and probably will tweak it a little more--if I fill the 9x13 pan they are too thin to stick together well, but I just leave 3 inches at the end clear and they're thick enough to stick really well.
No-Bake Chewy Granola Bars
(recipe makes a 9x13 pan)
2 cups quick cooking gluten-free oats (or pulse whole oats in a food processor a bit)
1 C GF Rice Krispies cereal
1/4 C butter
1/4 C honey
1/2 C brown sugar
1/2 tsp salt
1/2 tsp vanilla

I've subbed in coconut oil for the butter and it works just fine and makes it dairy-free as well. I think it doesn't stick together as well as with the butter, though. I've read that clarified butter is actually casein-free, so I've made some clarified butter to use and like that taste a little better, but it adds a lot more time--rather than making it in less than 5 minutes it's more like 15.

Mix -In variations listed below

1. In a large mixing bowl, mix together the oats and cereal. Set a small saucepan over medium high heat and melt the butter. Add the honey, brown sugar and salt. Stir together then leave it alone as it comes to a boil. Once the boil has reached all the way around the edges of the pan, begin timing. Allow this mixture to boil for 2 minutes and 15 seconds. During this time, you may need to turn the heat down a bit so it doesn't overflow, but be sure it keeps boiling.
2. Pour the mixture over the oats, using a rubber spatula to get all the sugar mixture out of the pan. Mix the ingredients together until the oats are completely coated. Add in your desired mix-in then press very firmly into a lightly greased 9x13" pan. If you like your bars thicker, you can use a smaller pan. If you do not press firmly enough, the bars will fall apart when you eat them. Place them in the fridge for 20 minutes then cut to size. Like I said, I do it about 9x 10 or 9x11 to get the thickness I like. I use a pizza cutter to cut them, except the very edges, which require an actual knife.

Chocolate Chip
Add 1/2 C of mini chocolate chips to the finished mixture before pressing into the pan, allowing it cool just a bit or you will end up with melted chips. Sprinkle on a few extra chips over the top after they are pressed into the pan.

White Chocolate Cranberry
Add 1/3 C of white chocolate chips and 1/3 C of Craisins to the finished mixture before pressing into the pan, allowing it to cool just a bit first or you will end up with melted chips.

Candy Bar
Add 1/3 C of Heath bar pieces, 1/3 C of mini M&M's and 1/3 C of chopped pretzels to the finished mixture before pressing into the pan.

Peanut Butter
Add 2 Tb of peanut butter to the finished sugar mixture before pouring it over the oats. Once mixed with the oats, add 1/2 C peanut butter chips before pressing into the pan. This is my preferred mix in, along with chocolate chips.

Raisin Nut
Add 1/3 C of chopped raisins and 1/3 C of chopped pecans to the finished mixture before pressing into the pan. 


I haven't gotten the timing right to not get the chocolate chips to melt, so they're pretty darn messy. But they are oh, so tasty.
Posted by Picasa

Wednesday, February 8, 2012

EASY Apple/Pear Crisp

This is a real quick recipe for a delicious dessert. It uses canned pears and apple pie filling so there's no peeling and slicing which makes it quicker than quick. I think I got this recipe originally from A Soft Place to Land several years ago.

Recipe:
4 15 oz. cans sliced pears, drained
1 20 oz. can apple pie filling
1 1/2 C. gluten-free oats
3/4 C. GF flour
3/4 C. brown sugar
3/4 t. ground cinnamon
3/4 C. butter (or we use Smart Balance Light since it's dairy-free), cut up

Preheat oven to 425 degrees.
Pour the pears and apple pie filling into a 9"x12" pan.
Mix the dry ingredients together, then mix in the butter using your fingers until it resembles coarse crumbs. Crumble the topping on top of the fruit.
Bake for 30-35 minutes until the fruit is hot and bubbly and the topping is crisp and browned.
Enjoy. With some vanilla ice cream if you've got it on hand.
I've made this in an 8x8 pan, too with half the fruit, but the same amount of topping, which I like better because then the topping is a bit thicker and covers it better. Have some for dessert, then eat the leftovers for breakfast, because really, it's just fruit and oatmeal. And sugar. :) Enjoy!!

Wednesday, December 14, 2011

Caramels

If you're looking for more tasty candy recipes, here's another REALLY easy one. Just don't think about how much fat and sugar you're putting in. Or give away most of them, and the ones you eat get cancelled out by your generosity. :)
Caramels:
1 can Eagle Brand Sweetened Condensed Milk (use the can for measuring the other ingredients)
2 sticks of butter
1 can Karo syrup
1 can sugar
1 can brown sugar
Combine all ingredients in a saucepan that's big enough for the liquid to more than double when it's boiling and cook on high heat, stirring constantly until it reaches soft ball stage. That means stir for a long time. Pull out your favorite Christmas book to read while you stir. To test for soft ball stage, fill a cup about halfway with cold water and put a little of the caramel into the cup. When you can pull it out in a nice soft ball that is as soft or hard as you like your caramels, turn off the stove. Pour the mixture into an ungreased cake pan and let cool. Cut into pieces and wrap with wax paper. I've found that a pizza cutter can work pretty well.
One batch can make 150+ caramels. It goes a long way. Enjoy!
Posted by Picasa

Candied Pecans

'Tis the season to be baking. Fa la la la la, la la la la.

But as you will hear from many sources, if you're giving away food to non GF-ers, GF cookies or cake probably aren't the best options because the will taste "weird" to untrained taste buds. So stick with candy and other junk food that is naturally gluten-free. :)

This is the tastiest treat EVER! Candied pecans. And so easy to make.
Recipe:
2 lbs pecans
Whisk together 2 egg whites, 6 tsp (good) vanilla, 2 tsp water.
Put nuts in a BIG Ziploc and add the liquid, smoosh around. (Yes, that's the technical term)
Mix together in a bowl: 2 cups sugar, 4 tsp cinnamon, 2 tsp salt.
Dump this in the bag and smoosh around some more until they look coated. Put on a sheet cake pan and bake at 300 for an hour stirring every 15 minutes or so.
It will fill your home with a delicious aroma, and tastes just as good. I packaged them into little baggies to give to some friends and neighbors on goody plates along with some fudge and caramels.
Hope you enjoy them as much as my family does!!
Posted by Picasa

Saturday, October 1, 2011

Cinnamon Rolls

I'm not real big on baking goodies. Mostly because I'm not all that big on eating them. I'll eat them and enjoy them when they're available, but I tire quickly and can't handle too much sugar, and usually half the batch will end up going stale before our family finishes eating it. That, or my 3-year-old will throw a fit every time I tell her she can only have one and it's not really worth it to have treats that inspire tantrums.

But twice a year for General Conference I make cinnamon rolls. Sweet treats to enjoy the sweet messages from the prophet and apostles. :) And this gluten-free version is pretty much the tastiest, fluffiest batch of cinnamon rolls I've ever had, with or without gluten. I originally found the recipe here, but the process I've simplified a little.

CINNAMON ROLLS
2 tablespoons shortening
1/4 cup sugar
2/3 cup of milk, room temperature
1 packet yeast
1 egg
1/4 cup canola oil
1/2 cup potato starch
1 cup corn starch
1/4 teaspoon baking soda
2 1/2 teaspoons xanthan gum
2 teaspoons baking powder
1/2 teaspoon salt
1 teaspoon vanilla extract
TO SPRINKLE ON BOARD COVERED WITH PLASTIC WRAP OR PARCHMENT PAPER
1 - 2 tablespoons sugar
Preheat oven to 375 degrees.
In medium bowl, combine shortening and sugar. Mix well. Measure warm milk and add yeast to milk. Whisk well to fully dissolve. Add milk/yeast to sugar mixture. Add remaining ingredients. Mix very well, being sure to remove all lumps. Dough will be quite soft--so soft it almost looks like liquid, still, but if you keep mixing it'll get a little more solid, though still really soft (soft enough that it doesn't really look like dough and you'll think that you messed up).
Lay out either a 15 inch square of parchment paper or plastic wrap. I like parchment paper better. Squish it out into a roughly square shape, then put plastic wrap on top and roll out until it's about 13-15 inches square.
FILLING (I actually use about half this much)
1 cup brown sugar
1 1/4 teaspoons cinnamon
1/3 cup chopped nuts - optional


Spread the filling over the dough, leaving a little room at the edge as it spreads when you roll it up.
Roll the dough into a nice long roll.
Cut into pieces about 1 1/2 inches wide. I use dental floss to cut it without squishing it like a knife does. You can get about 8 or 9 rolls out of this.
Put in a round cake pan and either cook it or stick it in the fridge to cook in the morning.
Cook at 375 degrees for about 20 minutes.  If you keep it in the fridge over night take it out and let it warm up closer to room temperature before cooking it. After cooking spread the glaze over the top.

GLAZE
¾ cup powdered or confectionery sugar
1 teaspoon vanilla extract
milk to thicken

These are the fluffiest cinnamon rolls, probably because they are made only of starch. Not so big on nutrition, but they sure taste good!

Thursday, September 22, 2011

Pumpkin treat

My husband's birthday was last month, so instead of just a regular cake, I decided to whip up this delicious pumpkiny dessert that my friend, Charissa, shared with me and quickly became a family favorite.

Pumpkin Treat
1 29 oz. can pumpkin
1 12 oz. can evaporated milk
2 eggs
2 t. cinnamon
1/2 C. sugar
Blend together above ingredients. Line a 9x13 cake pan with waxed paper and pour mixture in. Layer evenly over mixture:
1 dry yellow cake mix (Betty Crocker's GF mix works great)
1 C. chopped walnuts
2 sticks butter/margerine melted (drizzle over top of nuts)
Bake at 350 degrees for 1 hour. Cool completely. Invert cake onto serving tray and remove waxed paper.
Frost with:
3/4 C. powdered sugar
1 8 oz. package cream cheese
1 or 2 8 oz. tubs of Cool Whip (depending on your tastes)
Blend cream cheese until smooth. Add powdered sugar and mix well. Gently fold in desired amount of Cool Whip.
This is really heavenly. We are not normally walnut fans here, but all the flavors here mix so perfectly for the perfect fall cake.

There are tons of GF squash/pumpkin recipes here to check out!

Thursday, September 1, 2011

Tortillas

Since we eat so much Mexican food, tortillas have always been a staple in our house. Luckily Jake is pretty flexible and doesn't mind corn tortillas for tacos and such, though generally I prefer flour tortillas most of the time, except in enchiladas. The problem is, GF tortillas are a bit of a pain, in my opinion. But this recipe that I found here is pretty good, so it's worth it every once in a while.

I added a little oil to the recipe myself. I recently came across another tortilla recipe I have yet to try that has quite a bit of shortening that looks like it might be easier to work with than this sticky dough (I'm hoping--I'll let you know).
2 c. Gluten Free All-Purpose Flour Mix
1 1/2 tsp. xanthan gum
2 tsp. sugar
1 tsp. Salt
1 c. warm water

1 t. olive oil
Add the dry ingredients to a large mixing bowl and mix the ingredients thoroughly. (I do this with my hand) Add the cup of warm water and the olive oil to the bowl and mix the dry goods into the water with your hand. Just squish it all up until all of the dry ingredients are no longer dry.
Separate the dough into 8 pieces and roll each piece into a ball. Place all but one of the dough balls back into the bowl and cover with plastic wrap until you’re ready to work with them.
Sprinkle a clean, flat surface with a bit of rice flour and then roll you dough ball into a roughly circular shape. Get is as thin as possible.
Throw the tortilla onto a hot griddle (I use a cast iron griddle on medium heat with just a smidge of shortening or oil) and let it cook approximately 1 minute – or until it has started puffing up and the bottom side is developing those lovely brown spots. Flip the tortilla and cook the other side until is toasty as well.Slide the cooked tortilla onto a waiting plate and repeat from step 4 until you’ve cooked all 8 tortillas. I generally roll one tortilla out while another is cooking, so that there’s is always a tortilla on the griddle.

I've tried following her instructions, but the incredible stickiness of GF dough is so annoying to me, and once I got it rolled out, peeling it off the counter would ruin the tortilla. So I got myself a tortilla press and have made parchment paper my friend. I put parchment paper on both sides of the tortilla, sometimes with a little cooking spray on it, then squish it to the right thickness in my tortilla press.
If the parchment paper comes off, I pull it off, then throw it on the griddle. If not, I throw it on the griddle for a minute or so until it's slightly cooked and easier to pull the parchment paper off.
Then finish cooking it, but not so much that it's crunchy--just enough that it's still nice and pliable.
The tortillas themselves are quite tasty and actually pliable, and a much nicer texture in my opinion than the brown rice tortillas you can buy at Sunflower Market. They're worth all the work every once in a while.

Edit: I tried the other recipe and it was WAY easier to work with than this dough--held together way better (I didn't use the full cup of water). Try it out!

Monday, August 29, 2011

Bread fail

Last week marks the 1 year anniversary of Jacob being diagnosed with Celiac Disease. I remember well my first attempts at making gluten-free bread. Many of them fell in or were just flat and dense. It took a little while and some experimenting with various mixes and recipes before I settled upon the bread I make most of the time.
During the months of July and August I experience about 4 or 5 different bread failures. The first one I noticed was so HUGE when it came out of the oven, and I got all excited: Wow a real-sized loaf!
Then it collapsed. Of course. It had over-risen. All of my subsequent failures were similar. After a couple times I figured it must be all the extra humidity in the air from monsoon season that was making the bread rise too quickly. I tried adjusting the moisture in the recipe and the time I let it rise, but nothing worked, and I finally just gave up until monsoon season is over in the next couple of weeks.
Maybe next year I'll stock up and have a baking frenzy in June so I can have enough bread frozen to last us through monsoon season. I don't know how people in more humid climates manage GF bread. Another reason to be thankful for our "dry heat" here in Arizona. :)
Posted by Picasa

GF on a Shoestring (and Fried Rice)

I recently purchased a great cookbook: Gluten-free on a Shoestring. She also has a blog. I've only tried a few recipes, but so far I LOVE them all.

Last week I was on a baking kick and actually baked 2 things. In one day. I know. Crazy. My 10-month-old was only holding on to my legs crying for 20 minutes or so, since I mostly planned around her nap. :) 

The first tasty treat was this homemade apple pie-type pastry. Soooo good. And there was extra filling left over, which we all really enjoyed alone, too.
 
The other was pretzels. They were pretty good warm out of the oven, but I messed up on the directions for letting it rise, and going back and trying to do it later didn't quite work out, so I'll try these again soon. They ended up a bit dense and hard once they cooled off, but I am pretty sure following the directions next time will fix that.
 
One last TASTY recipe I really enjoyed was the Lemon Chicken. Since these recipes aren't mine and are copyrighted, I probably shouldn't share them, but I can share how I made some tasty fried rice to go with the lemon chicken. I may try this in the future with orange juice and orange zest, and see if I can somewhat replicate good ol' Panda Express' Orange Chicken.
 
The fried rice is very easy. First, cook some scrambled eggs (1-3 depending on your taste and how much rice you're using), and when the eggs are just starting to solidify, add about a cup of already cooked rice. Once the eggs are fully cooked add another cup or two of cooked rice and some mixed veggies. I just had frozen corn and peas, so that's all I threw in, and it worked great. Stir occasionally until the veggies are cooked/warm, add a splash or two of soy sauce (La Choy is gluten-free), and enjoy! This is so quick and easy. You can leave out the eggs if you want, but they're a nice extra splash of protein.
Posted by Picasa

Monday, July 18, 2011

Chipotle chili and cornbread

I always love a good crockpot recipe. As long as I remember early enough in the day to actually start it. I almost never can cook on low--if the recipe calls for low I half the time and put it on high, just because the earliest I ever remember to think about it is around lunch time. 

Here's a real good chili recipe I got from a Campbells Soup recipe book (of course we can no longer use Campbell's Soup because none is gluten-free, but at least the recipe book still is good for something). 
 
Chipotle Chili
1 jar (16 oz.) salsa
1 C. water
2 T. chili powder (I use less--more like 2 teaspoons)
1 large onion, chopped (about 1 cup)
2 lbs. Beef for stew, cut into ½-inch pieces
1 can red kidney beans, drained (or 2 cans, or 1 kidney, 1 pinto beans)
Shredded cheese (optional)
Sour cream (optional)
Mix salsa, water, chili powder, onion, beef and beans in slow-cooker. Cover and cook on low 8-9 hours, or on high 4-5 hours. Serve with cheese and sour cream, if desired.

Of course, nothing goes with chili better than cornbread. I found this AWESOME recipe at Gluten free Mommy. It is quick and easy and soft and fluffy and not too sweet, but sweet enough. It's just so tasty! Probably better than most regular gluten-ous cornbreads I've had.
GLUTEN FREE CORNBREAD
1 cup white rice flour
3/4 cup stone-ground cornmeal
2 to 3 Tablespoons of sugar
2 1/2 teaspoons baking powder
3/4 teaspoon salt
1 teaspoon xanthan gum
1 Tablespoon butter
2 beaten eggs
1 cup milk
1/4 cup melted butter
Directions:
Preheat the oven to 400 degrees. Mix the dry ingredients (flour, cornmeal, sugar, baking powder, xanthan gum, and salt) together in a med. bowl and set aside.
Melt the one tablespoon of butter in a 10 inch cast-iron skillet or 8/9 inch round baking pan in the oven. This takes about three minutes. Swirl the butter around the pan coating the bottom and sides.
In a small bowl, combine the eggs, milk, and 1/4 cup butter. Add this mixture all at once to the flour mixture and stir until just moistened. Pour batter into the hot skillet or baking pan. Bake for 15-20 minutes or until a wooden toothpick comes out clean. Serve warm.
Posted by Picasa

Wednesday, July 13, 2011

Granola

Last week I was really wanting some granola, so I decided to try this recipe. It smelled so good. Until it stayed in the oven a little too long and came out burnt. I guess when the recipe says 25-30 minutes, that's what it means. Wierd.
Anyway, I tried it again the next day and it turned out delicioso!

I adjusted the recipe a little, just based on what I had and what we like.
3+ cups GF rolled oats
1 cup crushed GF corn flakes
2/3 cup slivered almonds
I really like using pecans in granola, unfortunately I used all our pecans on the burnt batch. :(
1/3+ cup flax seed meal
2 teaspoons +/- cinnamon
2 Tablespoons butter, melted
2/3 cup pure maple syrup (we used Eggo syrup--not exactly pure maple, but good enough for me)
2 Tablespoons brown sugar
1 teaspoon GF vanilla extract
Directions:
  1. Preheat your oven to 325F
  2. Line a baking sheet with parchment paper.
  3. Melt the butter in a large bowl or glass measuring cup in the microwave.
  4. Add the maple syrup and brown sugar to the melted butter. Return to the microwave for 20 seconds or so to help the brown sugar melt. Add the vanilla extract. Stir together well and set aside.
  5. Combine the dry ingredients (oats, pepitas, almonds, flax seed meal and cinnamon) in a large bowl.
  6. Pour the maple syrup mixture over the dry ingredients. Mix together to coat everything evenly.
  7. Pour the mixture on to the parchment lined cooking sheet.
  8. Bake for a total of 25-30 minutes, stirring every 8 – 10 minutes to avoid burning. Bake until toasted brown.
  9. Allow to cool before storing in an airtight container.
 Sometimes in making granola I'll use honey instead of syrup. Or part of each. Sometimes I like to substitute applesauce in for some of the honey or syrup or even for the butter. Applesauce is generally a good (and healthy) substitute for the oil/fat in most baking recipes. 

For granola my rule of thumb is anything goes. If you like sunflower seeds, throw some in. If you don't like almonds, leave them out. If you like your granola crunchy, keep it in for 30 minutes. If you prefer a little softer, take it out at 15 or 20 minutes. You can always throw dried fruit like raisins or apple chips in after it's cooled down, if you like that. I think this recipe is so tasty mainly because of the cinnamon and vanilla. Mmmmmmm!

Enjoy!
Posted by Picasa

Monday, July 4, 2011

Bread

In our pre-GF days I used to grind our wheat and make our bread most of the time. I'd make 5 loaves in a batch and it would last 5-8 weeks. We're not huge bread eaters here, luckily (I know some families who go through almost a loaf per person per week). Upon Jacob's diagnosis we had to decide how to go about the bread thing. We tried some of the $6 for a mini-loaf of cardboard that they call GF bread at the store, and soon after started trying out various bread recipes and mixes. We have since found one (Udi's bread) that is decent, but it's still hard for me to bring myself to pay $6 for half a regular loaf. So I make our bread. One day in the future when I have school lunches to make I'm sure I'll give in and buy wheat bread to save myself from baking so much stinkin' bread, but for now we don't go through bread fast enough, and besides, for now that saves us from the hassle of having two separate peanut butter jars, jam jars, Miracle Whip jars, etc. to avoid cross contamination.

Anyway, since with GF baking you have to use several different kinds of flour, I've got my staple flours that I always have on hand:
brown rice flour (I grind that myself)
tapioca flour or corn starch
potato starch
soy flour
almond flour
I also occasionally have other flours, like oat flour, coconut flour, masa flour, or sorghum flour, depending on recipes I want to try.

I ended up giving my wheat grinder to my parents (in case they ever need it to use all the food storage they have, but have no way of grinding), since there's no way to clean all the wheat out of it. So I got a new grinder out of this deal. I use it mostly to grind rice to make rice flour. I've also used it for quinoa, and popcorn to make corn meal (I've tried a couple different corn meals from the store, but they've been cross contaminated every time, tested with this, so I just grind my own now). In looking into food storage options I read that the GF flours do not store well for long term (though starches do fine), and it's better to store the whole grain, then grind it. So one of these days I'll pursue that and get some soybeans or some other stuff...

Anyway, in the meantime, I make bread. Unfortunately GF bread is harder to make fluffy, and the dough is rather gummy, so I can't make my big 5 loaf batches that I used to do, because my bosch can't handle it. Two small (8 x 4 ½ in) loaves fit barely, so I stick with that. The smaller loaf pans work well, too, because even with a regular 9 x 5 pan, the dough won't rise as much as you're used to, so it looks squished. With the smaller pans it looks a bit more proportional.
I tried many recipes and store-bought mixes. This is the best I've found. It's actually edible without toasting it (a rarity for GF bread). And with the soy and brown rice and almond flour, it's actually pretty nutritious.
I got the original recipe here, then adapted it just a little based on what I usually have on hand in my kitchen.
For two 8 x 4 ½ loaves:
1 ½ C. GF flour mix
1 ½ C. brown rice flour 
½ C. soy flour
½ C. tapioca flour 
¼ C. almond flour
¼ C. potato starch                (or 4 ½ cups total GF flour)  
4 ½ T. heaping tablespoons ground flax seeds 
¾ C. instant non-fat milk -or- dry milk substitute  
1 ½ T. xanthan gum  
1 ½ t. unflavored gelatin  
1 ½ T. Sure Jell 
 ¾ t. teaspoon salt 
3 T. egg powder (or if using real eggs, do 3 eggs in the wet ingredients)
 

Leavening/Proofing Ingredients:
4 t. active dry yeast 
3 t. brown sugar/honey 
½ C. minus 2T. warm water (110 degrees) (if using real eggs, just ¼ C. here)

Wet Ingredients:
2 C. warm water (110 degrees)
(3 eggs, room temperature, beaten, if not using egg powder)
3 egg whites, whisked
6 T. olive oil (or vegetable oil or smart balance margarine, melted)
1 ½ t. apple cider vinegar

Directions: 
Mix all dry ingredients in stand mixer. Proof yeast and let stand until bubbling. Mix wet ingredients in separate bowl. Add yeast mixture and wet ingredients to dry ingredients and mix for 8-10 minutes. The dough should begin to be a little more stringy, but mostly resembling a very thick, sticky cake dough. 
Heat oven to 200 degrees, and turn off immediately. Spray loaf pans with cooking spray and divide dough evenly into pans. Smooth tops with a wet spatula. Spray 2 sheets of plastic wrap with cooking spray and cover each pan gently, sprayed side down. Place covered loaves in oven to rise for 45 minutes to an hour.
Heat oven to 350 degrees then cook for 30-35 minutes. Crust should be light brown and thermometer inserted should read 190 for a finished loaf. Let loaf cool completely before cutting. 
Enjoy!

As a side note, for the GF flour mix, I usually do:
3 parts brown rice flour
3 parts corn starch (sometimes tapioca flour instead)
2 parts soy flour
1 part almond flour (though I do sometimes use masa flour)
Posted by Picasa

Friday, July 1, 2011

Patriotic Rice Krispy Treats

My 3-year-old wanted to make cookies today, but I wasn't quite up for it. First of all, I'm a bit lazy and it seemed like too much work. B. It's 110 degrees outside and turning on the oven doesn't sound like the best idea. And III. I'm not much into cookies. I'll one or two if someone else makes them, but even BGF (Before our Gluten-Free days) if I ever did make cookies half the batch would sit uneaten for days or maybe even weeks. And the GF cookies I've made always turn out kind of dry and crumbly, so I'm pretty sure a batch would claim it's spot on our counter, mostly uneaten for days on end.
So, since cookies were out, I suggested rice krispy treats, which were readily accepted (microwave=no heating up of the kitchen:). And with it being the 4th of July this weekend, we whipped out the food coloring to add to the marshmallows, and came up with a tasty, patriotic treat.
Apparently Rice Krispies is coming out (or has come out in some parts of the country already, I guess) with a gluten-free version of their cereal. Hooray for doing away with that dang malt flavoring! Until we see them on the shelves, though, we make our rice krispy treats with Rice Chex. They taste just the same and it's an easy substitution.

Happy 4th of July to all!!! May you enjoy fireworks, and avoid the fires. (Lets hope the fireworks don't start a bunch of new fires now that they're just getting all of the fires here in Arizona under control.)
Posted by Picasa

Tuesday, June 7, 2011

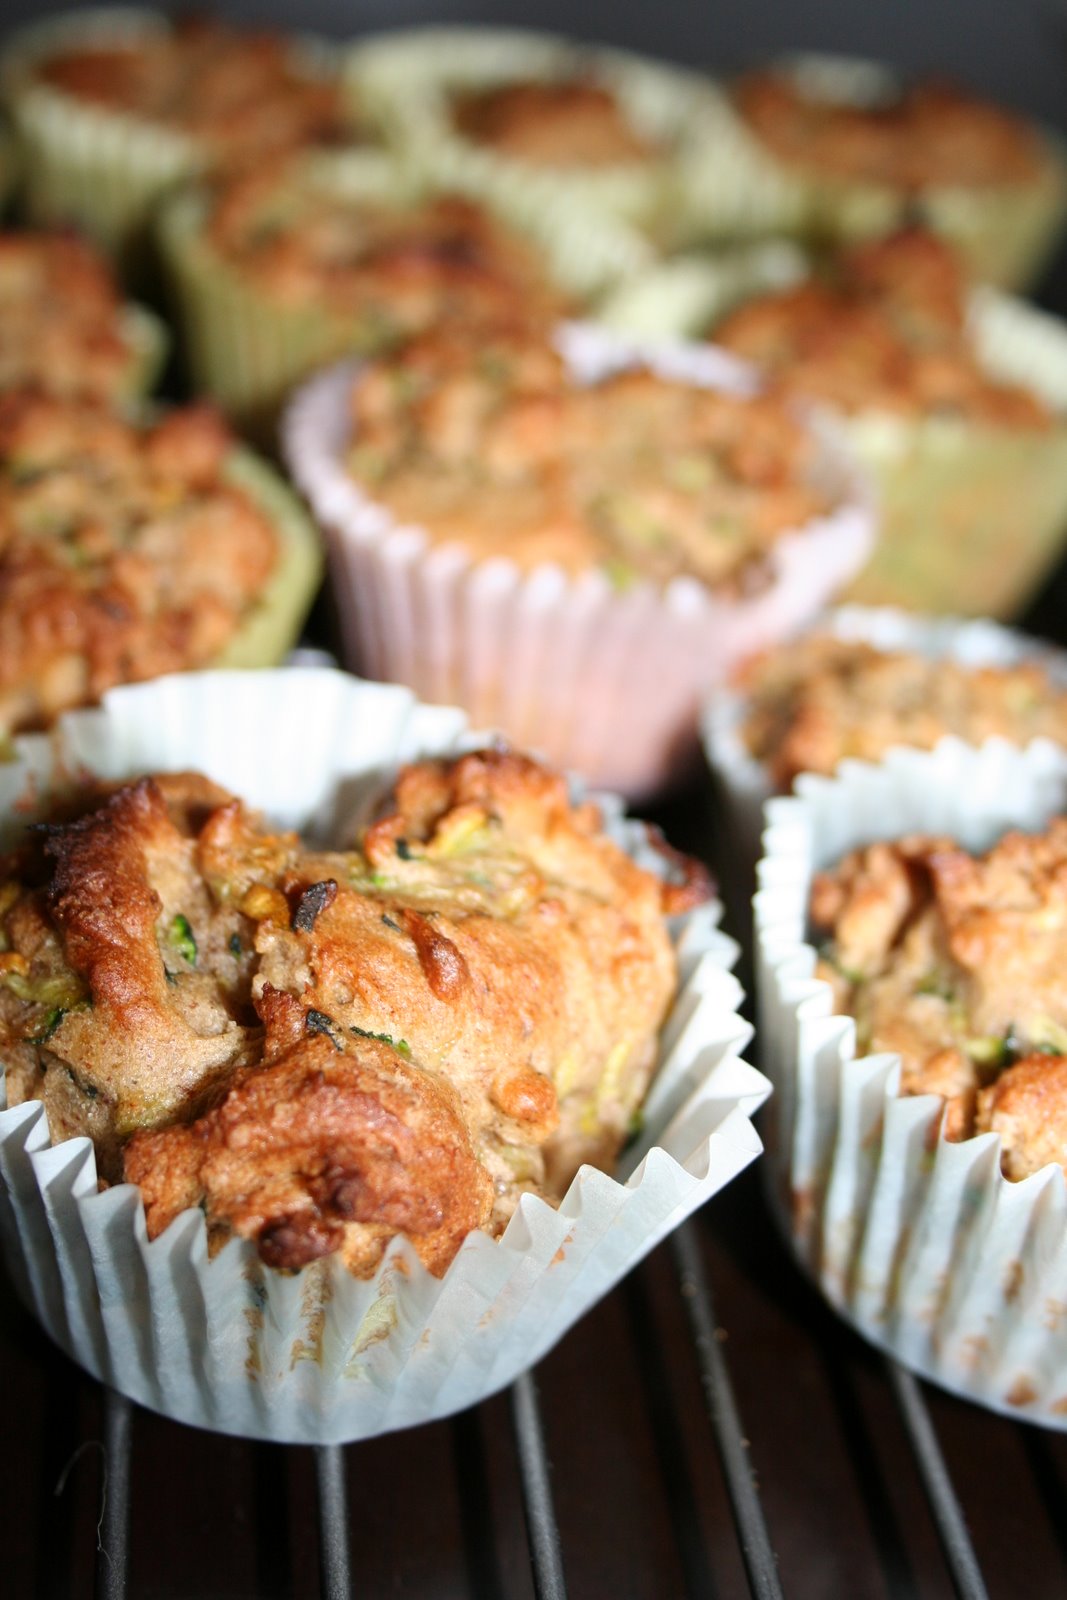
Zucchini muffins

A friend brought over some zucchini bread on Sunday that was so delicious my daughter and I consumed it all in about two hours. I felt a little bad that Jake couldn't enjoy any (but not too bad--more for me!). Luckily, our garden has just begun producing zucchini, though not yet at the rate of yellow squash (I'm sure it'll catch up soon). I used a couple zucchini to make a double batch of some gluten-free muffins. I didn't have any sorghum flour, so I just used soy flour.
Can I just say, YUM! These are the best zucchini muffins I've ever had, with or without gluten. The batter was pretty thick, almost like cookie dough (this may be because I added a little flax seed for a little nutritional boost, but didn't add any liquid). The outside gets nice and crisp, and the inside is perfecly moist. More than half of the muffins were gone before the end of the day. Looks like I'll be making this again soon. Luckily I discovered last summer in my pre-GF baking that yellow squash is interchangeable with zucchini in baking with no noticable difference, so yellow squash muffins, here we come.
Posted by Picasa